Macros can be called from a Job's source and are used to perform repetitive tasks such as outputting the values of all the Parameters of a Job to the log. Macros are similar to a method because they can be called from your source and pass values such as a Parameters. JAMS comes with a set of default Macros called the "Base Macro". In addition, you can create your own custom Macros.
A Macro is called from a Job's source using parsing. You can call your own Macros, or automatically call Macros from the Base Macro file that comes with JAMS. To call a Macro with parsing, use the format: "<%MacroName%>". You can also pass the Macro values such as Parameters with the format: "<%MacroName(valueToPass)%>". Once a Macro is called it executes, allowing the Job's source to continue to run.
| Calling Macros With Parsing |
Copy Code
|
|---|---|
"<%SampleMacro1%>" "<%SampleMacro3%>" # # This Macro will be called once for each Parameter that the Job # has, and will pass in each Parameter one a time. # "<%SampleMacro2(JAMS.Parameters)%>" |
|
While you can call Macros from the Base Macro included with JAMS, it is also possible to create your own custom Macros. A Macro is basically an xml file containing one or more Macro. Use the syntax in the code below at the beginning and end of your sample Macro file. Between the start and end tags (<ArrayOfMacro>) enter the Macros as shown.
 |
Note: Within the Macro make sure you put your code in the <![CDATA["Your code here" ]]> section. Within this area use the syntax of the language that will be calling this Macro. For example, if a PowerShell Job is calling the Macro then use the syntax of PowerShell within the CDATA block. |
| Creating Custom Macros |
Copy Code
|
|---|---|
<?xml version="1.0" encoding="utf-8" ?> <ArrayOfMacro xmlns:xsd="http://www.w3.org/2001/XMLSchema" xmlns:xsi="http://www.w3.org/2001/XMLSchema-instance"> <!-- Put the above code at the top of your Macro file. This is an area to put comments about your Macro file. This code sample will demonstrate the syntax of Macros. --> <Macro name="NameOfMacro"> <Code> <![CDATA[ # # Use the tags <Macro><Code> above and below this area on all your Macros as shown here. # Your code would go here. You would replace the above "NameOfMacro" with the # desired Macro name. # ]]> </Code> </Macro> <Macro name="SampleMacro2"> <Code> <![CDATA[ Write-Host "This is where the code for SampleMacro2 would go." ]]> </Code> </Macro> </ArrayOfMacro> |
|
Parsing within Macros
It is also possible to use parsing within a Macro. This allows a Macro to use parsing features such as accessing JAMS Variables or Job properties. Also, this allows you to call a Macro from within a Macro. The syntax for parsing within a Macro is the same as normal parsing. See Parsing Parameters and Variables and Parsing Job Properties Documentation for more details on parsing syntax and the values you can obtain with parsing.
| Parsing within Macros |
Copy Code
|
|---|---|
<Macro name="SampleMacro1"> <Code> <![CDATA[ write-host "The current Job is <<JAMS.Name>>. The value of Variable1 is <<Variable1>>" # calling SampleMacro2 with parsing "<%SampleMacro2%>" ]]> </Code> </Macro> <Macro name="SampleMacro2"> <Code> <![CDATA[ Write-Host "this is Macro 2" ]]> </Code> </Macro> |
|
Passing Values to a Macro
As described above it is possible to pass values to a Macro. For example, to call a Macro named "PrintParameters" and pass it to the Job's Parameters you would use "<%PrintParameters(JAMS.Parameters)%>". This calls the Macro once for each Parameter within the Job's Parameter collection. The Macro can then access the object's properties. The object passed into the Macro becomes the default object, and because of this has slightly different syntax. If you pass in a Job's Parameters, which are curParams, you can then access any of the objects properties such as name or value. Inside the Macro that is passed you would use the value <<PropertyName>> to access the objects properties. In the case of a curParam you can access the value by using <<Value>> or the name property using <<Name>>.
| Passing Values to a Macro |
Copy Code
|
|---|---|
<Macro name="SampleMacro4"> <Code> <![CDATA[ # # This Macro demonstrates how you can access the properties of an object that has # been passed to a Macro. This Macro would write the name and value of each # Parameter to the Log. # Write-Host "Parameter Name: <<Name>>" Write-Host "Value: <<Value>>" ]]> </Code> </Macro> |
|
Macro Inheritance
There are three places you can call a Macro from. The first is the Base Macro which has a contains a few predefined Macros. This xml file is installed with JAMS and should not be modified as these changes will be lost when installing a new version of JAMS.
The second place you can call a Macro is the "Default Macro File". This is an xml file that contains your custom Macros, and is the best place to put Macros used for multiple Jobs. Also, this is a good place to put your Macros because Jobs in located in different Folders can easily reference a Macro in the Default Macro File.
The third place to call a Macro from is in a Folders Template Library. This allows you to define a path to a custom Macro file that can then be used by any Job within the Folder. A Macro is first searched within the Folders Template Library, followed by the Default Macro file, and lastly in the Base Macro. The first Macro found with the Macro name is used, so make sure to use unique names when defining your Macros to avoid using the wrong Macro.
Defining a Default Macro File
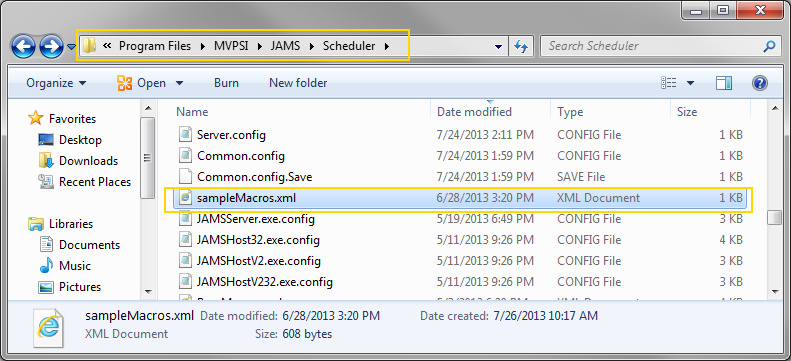
The "Default Macro File" must be located in the Scheduler folder in your JAMS installation folder: "x:\Program Files\MVPSI\JAMS\Scheduler\YourMacroName.xml". This is the same folder that the Base Macro is located in. Your Macro file can have a different name then the one below, however you must be consistent with that name in the following steps in order to have JAMS correctly locate your Macros.
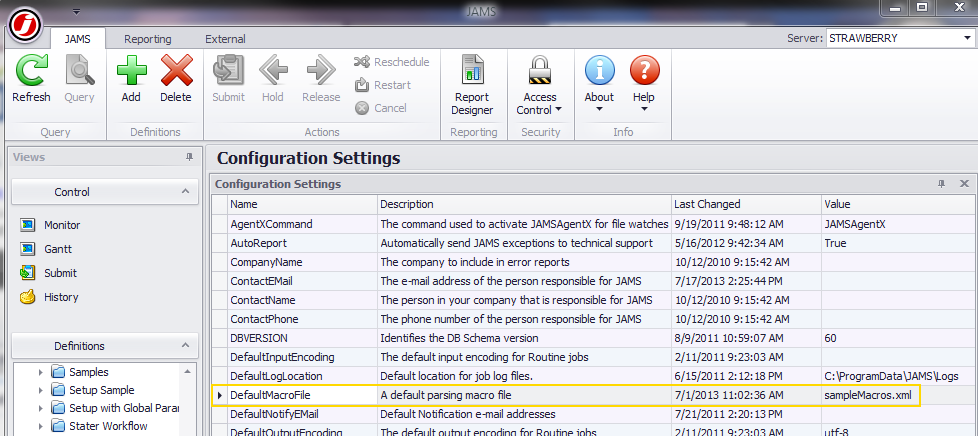
Next, you must change the "DefaultMacroFile" value in the Configuration Settings to the name of your Macro that is saved in the install location described in the previous step. To change the setting double click the DefaultMacroFile setting to open the dialog.
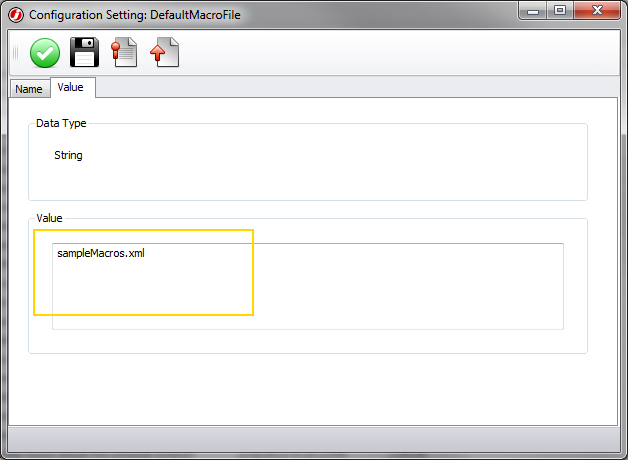
The value should be the name of the XML file saved in the installation folder.
|
Note: The value should only include the name of your custom Macro file, and not a full path. |
You can now reference any Macros you defined in the "Default Macro File" from any of your Jobs using the parsing syntax described above.
Folders also include a setting that allow a path to a custom Macro file to be defined. This allows any Job within that Folder to reference a Macro within the specified file. To define the location of this Macro open the properties of a Folder and then select the Properties tab. Within the properties tab open the Source Options group. The path to the Macro file is defined in the Template Library field as shown below.
|
Note: The Template Library setting requires the full path to the Macro file. |
 In summary, Macros allow for common tasks to be called from one place, which is similar to a method. Macros can be useful when working with collections, such as a Job's Parameters, where you want to repeat the same action for each object. By using parsing within Macros you have access to unique tools to create customized functionality within JAMS.
Click here for a downloadable sample.